You can see that we've drawn the Gnome on the corner.
Use the scroll saw to remove the excess wood.
Make stop cut across the bottom of the Gnomes hat. Carry these stop cuts around the edges of your blank.
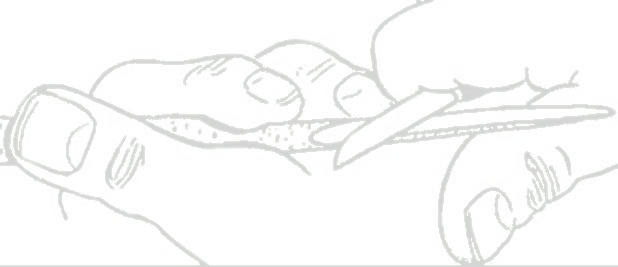
Use a thumb assisted push cut up to the stop cut at the bottom of the hat. Make these cut across the hats bottom to make the hat stand out from the Gnomes face.
Using the tip of the knife make a plunge stop cut at the sides of the nose.
.Remove the chip that is formed by these two stop cuts at the side of the nose.
Chip removed from the side of the nose and the top of the eye area.
Make a stop cut that defines the top of the Gnomes mustache.
Widened stop cuts at mustache top, with another stop cut angled into the first stop cut.
Make stop cuts that define the bottom of the mustache and remove wood up to these stop cuts at the bottom of the mustache.
Round the tip of the nose, and shape the sides of the nose.
Using the knife, shape the Gnomes hat and his beard. This can be accomplished
by merely tapering the hat towards its top, and the beard to the bottom.
Gnomes hat and beard tapered.
This Gnome Christmas tree ornament is about 4 inches long, yours can be shorter or longer. And since I'm planning on using mine on a tree by themselves, I will need lots. This means I'll finish them with stain or leave them natural. When ever I can I like to let the wood show. However, they would look super painted.


20 comments:
I just stumbled here from pinterest. ..I haven't whittled in YEARS! Now I'm so excited!! I can already tell my tendinitis isn't going to thank you but everyone else will when they get these for awesome Christmas presents! Thank you for your wonderful tutorials!! (I'm partial to gnomes and Santas...) Now to find some basswood....
Kim, Thanks for the nice comments. Gnomes are my favorites too. Just take a few Ibuprofen's and have some fun....
I love this one. I enjoy doing them. Plan to send to grand daughters and grandson.
What kind of wood is that?
That's BASSWOOD.
Me too, Kim. I received my first knife when I was 6 years old. I have drifted away from whittling through the years, but, this tutorial has me excited as well. Like you my hands have seen better days. Please post your renderings so we all can admire them!
BTW: My Aunt by marriage is Minnie Adkins. She is a folk art artist -- the lady who carves the roosters.
beginner here... in the second picture from the top, it looks like you have split the wood in half???
Wood is not split in half. The blank is a piece of basswood, and the image is drawn on the corner....half of the face is on one side of the corner other half on other side of the corner...
Opps, maybe you referred to the fact that the 1 x 1 inch x 4 inch piece of wood is split into two pieces so that you can carve the face on each pieces corner....In that case I did cut the wood. However I did not start with the basswood in a 1 x 1 inch x 4 inch piece. What I do is start with a 1 x 6 x 18 inch piece of wood, set the table saw at 45 degrees and rip the lengths so that they are triangular inwidth..
thank you very much.. and thanks for the quick response.
Way to go anybody can follow those instructions
Fomthese techniques to other faces isn't hard. I'm caring a figurehead for a small (pixie scale)pirate ship thanks to this.. and lots of little faces in spoons, bowls, mugs, walking sticks, shelves...
Thanks Paul and all who check out the blog, and especially those who leave a comment.
Tom Hindes
Could I please ask what is basswood im not sure if I can get it in australia im havent started carving as yet but really want too so if I cant get this type of wood what else can I use please :-) regards Vicki x
Basswood is LINDEN wood in England and Europe. It generally is clear white wood that carves well and retains the detail. I will make an inquiry about good carving wood in your Australia and post what other carvers say.
Tanks for your interest....
Tom H
Vicki,
Jeluton seems to be available "down under", and is said to be a good choice.
Tom H
How about Limewood. I think that is what it is called in Europe.
You know in the U.S. there is a wood called Crepe Myrtle. I carve it often & it carves like basswood, and even better, but, you have to carve it green to enjoy it. It becomes like a rock when dried out. Also, you want to use pieces that are about an inch or less in thickness. Bigger pieces crack quickly. I like it for small stuff though. I like to carve Santas and chess sets.
I believe that Limewood is the same as Basswood....
Rookie carver here! Thanks for the tutorial. You make it easy to folow.
Post a Comment