Wood Carving discussions on techniques, projects, beginner, basic, general and advanced skill levels
Showing posts with label carving tutorial. Show all posts
Showing posts with label carving tutorial. Show all posts
Friday, December 18, 2009
Whittling as a Hobby
from Whittling as a Hobby website
Lawrence Spinak, Gloversville, NY USA. located at..
http://www.whittling.com/Projects/projects.htm
project page http://www.whittling.com/Projects/projects.htm
a note worthy project is located here for beginners and beyond skill sets
this is a 7/8 X 7/8 X 3 inch full body human character that with little effort could be modified into a female cowboy or Santa ...
I hope I made this understandable, topic open for discussion in comments


Sunday, October 4, 2009
Lynn Doughty's Videos
Lynn Doughty has posted
Carving Videos! Link...
presently only 6 videos on setting up and carving the head, but watch them for 5to7 minuet segmets almost 30+ minuets and come away with a little different understanding of the sequence of events in a carving...
This is something i been waiting for for as long as ive known about Lynn and his outstanding carving....
Be warned, its not a one click operation, but there is a method to the way he has them posted,
please leave him comments to encourage this behavior, as we all could use more of teachings from carvers of this professional nature...
 Link...
Wednesday, September 23, 2009
Proof of Ol' Thomp's Sawing Skill!
 I offer up this photo of a 1 1/2 inch Gnome cut out that Thomp did for me, as proof that he knows what he's talking about, and that he is skilled at that saw of his. He followed the same exact steps that his slide/video did. This cut out had 9 pieces too, but I sneezed and 8 of them went down behind my bench.
Tuesday, September 22, 2009
how to bandsaw or Scrollsaw cutout
scrollsaw cutout
sorry i didnt catch all spelling errors folks
Several tips that might help.
- I use a less expensive delta scrollsaw to cut out patterns in stock less than 2", with a fine toothed blade that has all teeth going the same direction to move the sawdust out, specifically polar 5 flying Dutchman, You may not own a scrollsaw, you may choose to cut out patterns with a bandsaw, or coping saw if you like punishment.
- if you dont have a saw, try your carving group, or cabinet shop to get your pattern cut out if you bring in the pattern they will cut it for a fee.
- Always cut out the outline of the pattern oversize. allow 1/16 to 1/8th" because weird things happen sometimes the side pressure on the blade or the grain will bend the blade and make a vertical taper cut.
- If you undercut the pattern, you might come up with a skinny santa to get proportions right in compensating
- In the first picture you might notice, the front view and side view are not the same height, i had to compensate, and cut off the top of the pattern to get the nose to come to the same height as side view.. this has to be done to some patterns
- Save all the scraps!, the 4 views 2 front and 2 side views can be shallow carved and turned into fridge magnets or santa shirt pins,, 4 scraps from the corners can be sent to tom h. he will find something to make out of them... grin!
Monday, September 21, 2009
how to bandsaw or Scrollsaw cutout 2
continuation,
Now carve it out remember you are carving 3D from 2D images.
and you have to make the judgments and keep an eye out on both front and side views at the same time to keep from cutting off the cheeks or nose,
the side view dont tell where to stop cutting or as to where the nose is, as well the front view dont tell where to carve the arms... good luck
Wednesday, September 16, 2009
Whittlin The Civil War Soldier
When I whittle a Civil War Soldier, I use only my pocket knife and a V tool. The V tool is used only to texture the beard and the hair. I have used 1/2 x 1/2 inch Basswood, but you can use any size that you have. I carve on the corner, and start at the top of the piece of Basswood. By starting at the top, I can adjust the sizes to fit the head. The style that I end up with is probably some where between flat plane and regular carving.
I have started this slide series with the soldiers head with his cap. I will continue with the body in the next few days. You have probably already noticed that there are only some small changes in the process of carving a Wizard, a Santa, and a Civil War soldier.
Sorry i waz dragging today...thomp
I have started this slide series with the soldiers head with his cap. I will continue with the body in the next few days. You have probably already noticed that there are only some small changes in the process of carving a Wizard, a Santa, and a Civil War soldier.
Sorry i waz dragging today...thomp
Sunday, September 6, 2009
Carving an Ol' World Santa Ornament
Here's a step-by-step slide series on carving a Mark Gargac style Ol' World Santa tree ornament. This ornament is carved on the corner of a 3/4 x 3/4 x 4 inch piece of Basswood. Since I am more of a whittler, I use a knife. Carving the beard and hair is yet to be done, and will be a separate series. As will the painting.
Some captions may be added, but it really is kind of easy to follow.
Sunday, August 30, 2009
Carving the Gnome
For those who asked for a step-by-step slide presentation of carving the little Gnome; here is a first attempt. To call it "quick and dirty" is appropriate. The proper way to prepare a step-by-step presentation is carve a bunch of the objects, to determine the best and most efficient way to carve it. I did not do this! I just started and took photos along the way. Besides, if I carve several of the same objects, they are never alike anyway; nor are the steps in the same order. Maybe that's why I like to refer to my stuff as whittlins.
I will probably refine this presentation at a later date.
This Gnome is whittled from a 3/4" x 3/4" x 4" piece of wood. It is carved on the corner, and ends up being 3 1/2" tall including the hat. I do not sand the piece, but notice that I do woodburn the intersecting planes, prior to painting.
sorry to butt in but i doubled the size of the video, hard for me to see. thomp....
Thursday, August 20, 2009
Little Gnome in progress!


Opps! Almost forgot to thank Ol' Thomp for the birthday greetings. You see we share the same birthday. Only I'm bout 12 years older than Thomp. Happy Birthday Thomp! Have a good one ol" friend.
Now, since this blog is supposed to address some carving items, I'll answer some questions about the carved Gnome that was previously posted. First, the pocket knife I use is a single lock back blade knife (OAR CARVER). And yes! I love it, after Rick from LITTLE SHAVERS reworked the blade, that is!
Marcia asked about the carving of the Gnome. I started out with a 6" piece of 3/4" x 3/4" basswood. I carved the Gnome on the corner with the pocket knife. I started the carving with the hat. The hat was first because it's on the end of the stick, and its size will determine the size of the Gnomes head. Next I roughed in the head and its hair. Next were the shoulders, and the bottom of the arms. I carved from the top to the bottom of the Gnome. I never worry about whether one shoulder is a bit higher than the other. If they're not even, it adds character. The Gnome in the photo is about finished. I'll have to complete the legs and feet, as well as clean up a bit.
I am doing one of these little Gnome a day, so the next one I'll try to remember to take some sequenced photos...
Friday, July 31, 2009
5 Minute Penguin!


One of the followers on my blog (Marcia), challenged me to come up with a 5 minute Penguin. Here's a little Penguin (complete with bow tie) that I came up with. There's lots more cuts on this than on the 5 minute owl. This one is carved on the corner of a 3/4 x 3/4 x 2 inch piece of pine. Stop cuts, thumb push cuts, and paring cuts. Really quite simple. Lots more chips than the 5 minute owl.
Tuesday, July 21, 2009
Carving Animals
According to vote we have a few carvers interested in Animal Carving.
since i need a project for today's post.
here's the way i go about it.

 check out used books and eBay you can get some deals,
but buying locally will get you the book faster.
check out used books and eBay you can get some deals,
but buying locally will get you the book faster.
The first animal i carved was a horse from an old Andy Anderson pattern, it didn't come out well at all, looking more like a jackass, but my 2 yr old grandson loved it to death.
ive tried to carve horses a few times since. even tried to carve from Lynn Droughtys horse tutorial,
but somehow came to a carving block and never finished it after i got a little off track by a 4 way bypass.
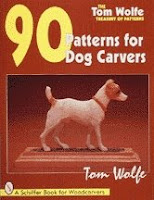
TOM WOLFE's Dogs


Most recently I have carved several tom wolf dogs,
with varying degrees of success,
Tom wolf has the knack for carving dogs, from a great 2 headed pattern

among all his books ive found this book best for hound dogs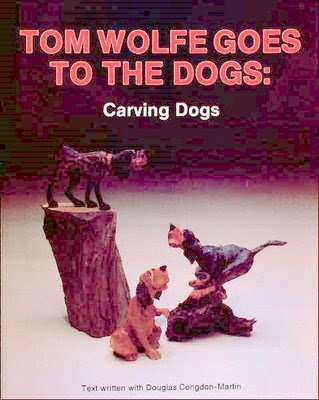 another great book for dog patterns is.
 another great book for dog patterns is.
 check out used books and eBay you can get some deals,
but buying locally will get you the book faster.
check out used books and eBay you can get some deals,
but buying locally will get you the book faster.
TIP:when looking for tom wolfe books its tough to dig through all the hits from searches, because there is another writer named the same, who is quite prolific. tom wolfe the carver has a middle initial of J he used in some of his books, wish there was an easier way to dig through a google search for him...
Tom wolf is not the only animal carver, but he is the one that came to mind..
if your wanting to carve a specific animal quickly, but cant find the pattern, just make your own, preform a google image search for the animal,
search through the picture images see if you can find what you are looking for,
dont quit there if you dont find just what your looking for, you can change the search from images to line art and search through them.
once the image is found or a likeness, you can use it as a guide and sketch the image right on the wood,
(lets all face it, most of us can identify or describe a horse, but to draw one is a different thing)
the more artistic challenged folks can save it to disk, print it, and even change printer paper size 5x7 3x5 or so on, to scale it from full page,. or print it out and take it to a copy center use a xerox copier for better scaling,
now use graphite paper and transfer your pattern to the block and whittle or saw off the waste,
keep your images for a map or study guide of the carving, refer to the photos and line art you found on google as a study guide..
well that's the way i do it..
hope this helps somebody.
Comments suggestions or better ways to do it are welcome..
remember: if you want to become a contributor write tom h. or myself stating so and we will add you as admin, you can post your heart away...
Wednesday, July 1, 2009
Three / Five Minute??? Owl
 From time to time we see questions about plans for the 3 or 5 minute owl. This example is the simplest we've seen. Just six steps, from the left to the right.
Sunday, June 21, 2009
Quick & Easy Wizard
 In the site survey most folks responded that they were more interested in quick carvings. Here's a quick little study of the steps to carve a Wizard. If you all want more detailed steps, just leave a comment saying so....
Just click on the photo to enlarge.
In the site survey most folks responded that they were more interested in quick carvings. Here's a quick little study of the steps to carve a Wizard. If you all want more detailed steps, just leave a comment saying so....
Just click on the photo to enlarge.
Subscribe to:
Posts (Atom)