
For the new whittler/carver, faces can be a challenge. Sure they are a challenge, but they need not be something to shy away from. Don't be intimidated! The following step-by-step tutorial is an effort to lead a newer whittler/carver through a whole bunch of steps that will result in a simple straight cut, whittled Santa. We'll use a 3/4" X 3/4" piece of Basswood, and start whittling at the corner. I am including a lot of photo steps, with some words to describe what is being done. Before actually cutting the wood, I would suggest, reading the words for each step and studying the accompanying photo. I will not mention anything about
safety nor knife stropping; other than practice safety and keep the knife very sharp.

Draw straight cut Santa on the corner of the wood.
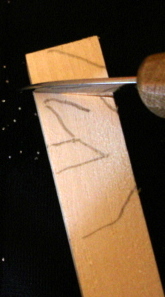
Make a stop cut at the bottom of the hat. Start the stop cut at the corner and "roll" the wood into the knife blade, all the way across the line. This stop cut will require some pressure on the blade to make it about 1/8 inch deep.

Make a stop cut at the bottom of the hat on the other side. Start this stop cut by plunging the knife blade tip into the wood where the two lines meet and "rolling" the wood into the knife blade. Make this stop cut through the corner to meet the other stop cut.

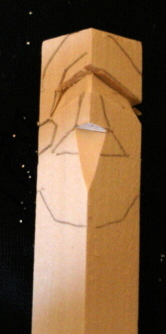
Remove small chip of wood from the edges of the face up to the stop cuts that define the bottom of the hat. Remove a small chip of wood from the top of the nose up to the bottom of the hat stop cut as illustrated.

Remove the wood between the chips that were just removed. This results in the face/head being kind of up in the hat.

Make a stop cut defining the bottom of the nose.
Remove a long chip of wood up to the stop cut at the bottom of the nose.
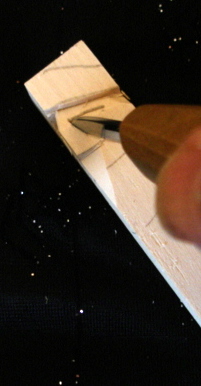
Make a stop cut that defines the side of the nose.Try to angle the knife blade slightly towards the nose. Plunge the knife blade tip into the wood where the top of the nose and the top of the eye area meet, then "rock" the blade down to the bottom of the nose.
Make the same stop cut on the other side of the nose.

Make a stop cut that defines the top of the eye area. Start this cut by plunging the knife blade tip into the wood where the top of the eye area meets the top of the nose; then "rock" the blade out to the side, following the line.
Make the same cut on the other side of the face,

Use the knife blade to remove the chip of wood that was created between the stop cuts of the nose and top of the eye area. This will open up the eye and the cheek area.

To open up the eye and cheek area on the other side of the face you will have to turn the wood "upside down" and use a Paring cut as illustrated.

This is a good place to break this post, as it is getting too long. We'll continue on the next post.
TIPS TO REMEMBER:
Don't twist the knife blade when making a cut, unless your blade is too long and you want to shorten it - it may break.
Stop and strop your knife every ten minutes of heavy whittling.
No comments:
Post a Comment